How to backup VirtualBox virtual machine
VirtualBox is a well-known tool that offers numerous features for effective virtualization. The program offers an amazingly simple interface with plenty of advanced functions for every need, including ability to copy or backup a virtual machine. Although you are the beginner or experienced user, you might wonder on how to backup VirtualBox virtual machine quickly and with minimum efforts.
How can you export virtual machine in VirtualBox?
The process of backup of your VM may require you a couple of minutes.
First of all, switch off your virtual machine and make sure to delete any off its snapshots.
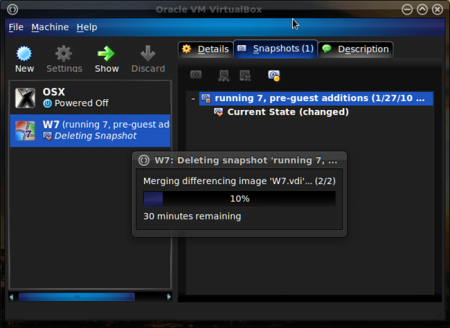
Than Select your VM and choose on “Snapshots”.
Now select the needed snapshot and press the delete button. The process may last several seconds, so be ready to wait a bit.
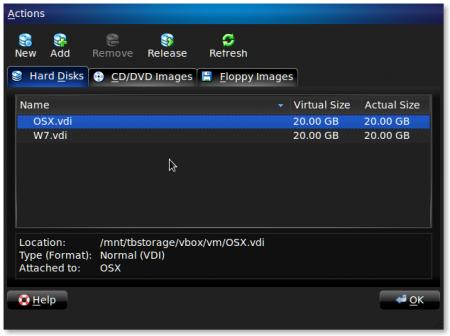
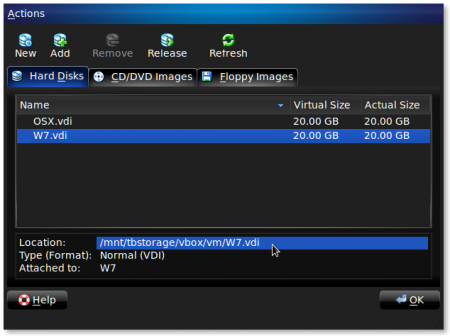
After you`ve successfully deleted your snapshots, go to File - Virtual Media Manager. Here you will find a list of different media that you’ve used on your machines.
Choose which virtual machine you would like to move and press “Release” icon. In our case, we`ll be moving W7.vdi file from the home directory to another hard drive.
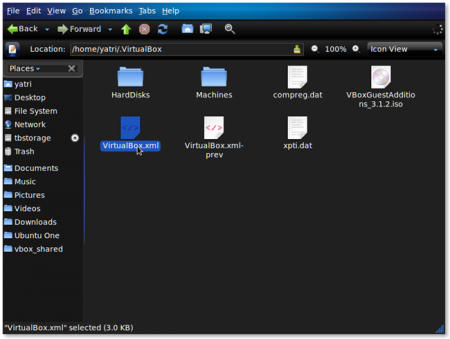
Then close VirtualBox and visit its default settings directory, usually located at /home/user/.VirtualBox/
You may also copy your .vdi file from inside the HardDisks directory in case you want to back it up, or you are free to move it. Wait for a while for the changes to come into effect.
Than you will need to change the VirtualBox.xml file. To perform the operation, open it in gedit.
Scroll down to find the needed lines.
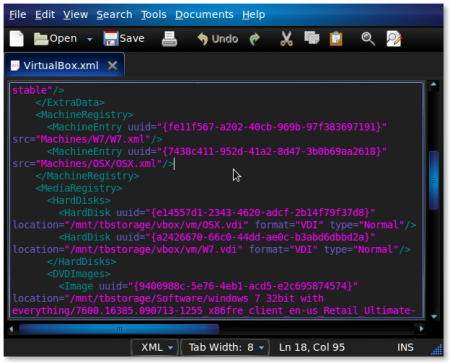
If you’re changing the location of your VM, search for the xml tags for “MachineEntry” and edit the source path. In case you’re moving your virtual disk images, search for the xml tags for “HardDisk” and edit its location.
Every machine is linked to a disk image by its unique UUID, which must not be edited. If you’re moving VM to a PC, make sure you`ve copied this file and replace the previous configuration file.
In our case, we are going to move the disk image to another drive, so we do not need any additional changes.
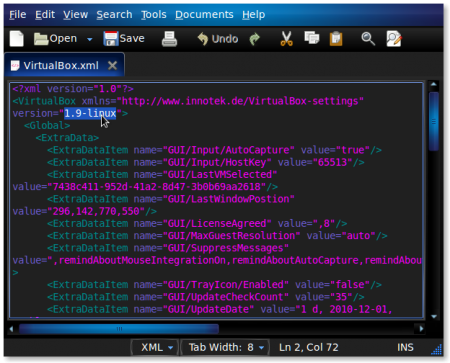
Note: If you’re changing hosts from Windows to Linux operating systems, you will need to change the version declaration for “windows” instead of “linux”.
Once you’ve moved the needed .vdi file, fire up VirtualBox and visit File - Virtual Media Manager.
Remove an old .vdi file. Choose “Add,” search its new location, and choose “Open.”
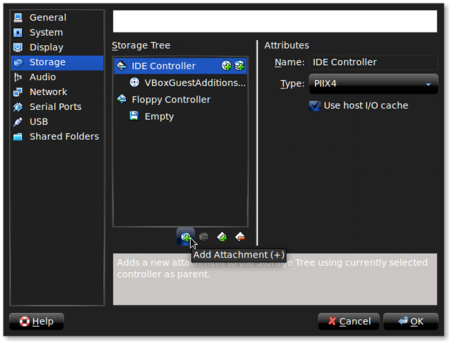
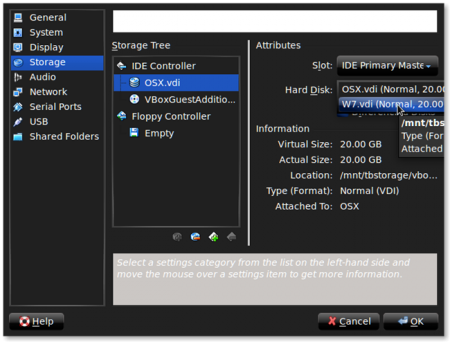
Now we need to attach the new .vdi to your virtual machine. Choose it at the main app`s screen, go to “Settings,” and choose “Storage”.
Click “Add Attachment” under the needed IDE controller. Click it and choose the correct .vdi file under “Hard Disk”.
All these steps will help you to export virtual machine in VirtualBox easily and absolutely quickly. In case you`ve faced any problems, make sure you`ve been using the correct paths.

Similar Materials