How to run Android on VirtualBox
VirtualBox is a world known tool for virtualization. You can easily setup different operating systems on your host OS using the app`s exceptionally useful functionality. Below you can find a detailed manual on how to install Android on VirtualBox with plenty of detailed screenshots.
How to run Android on VirtualBox?
Open the program and create a new VM :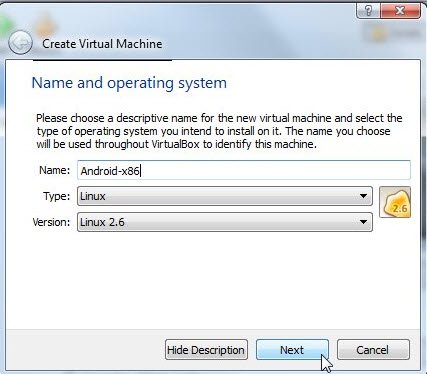
Start your VM and choose the needed ISO file as a virtual disk image in Devices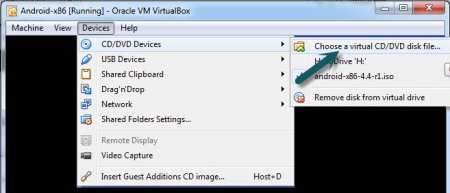
Restart your new machine. After that you will see the screen as follows: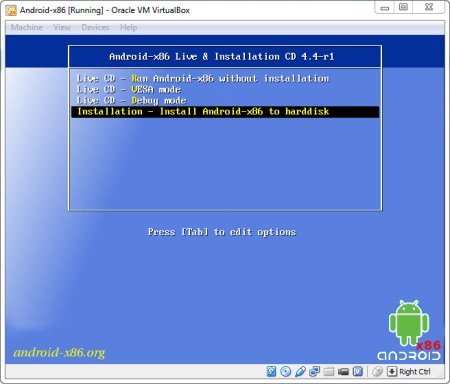
Now, navigate to Installation / Install Android-x86 to Harddisk and hit Enter. The installation will be launched automatically. To create a partition for Android installation, choose Create-Modify partitions.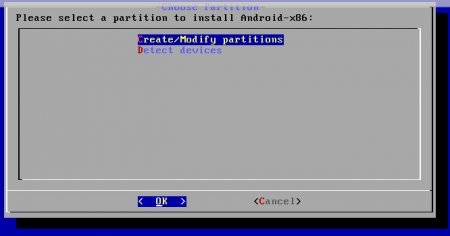
The black screen appears. No worries, everything is Okay. Choose New and press Enter to set up a new partition at the free space.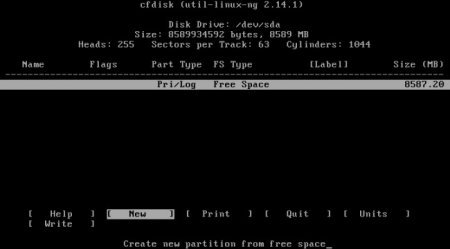
Choose Primary option and press Enter.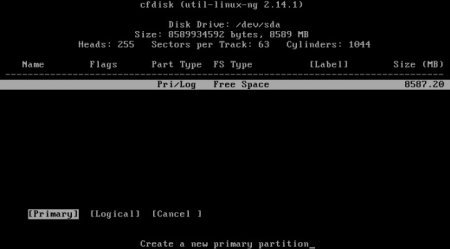
Here you will be asked about the size of the needed partition. Hit Enter one more time to set up the full space for the partition. Now select Bootable and move to Write option. Press Enter.
Once you`ve coped with this option, highlight Quit and hit Enter. After that you will see the partition at the top of your screen, selected by default. Press Enter to initiate installing Android to this partition.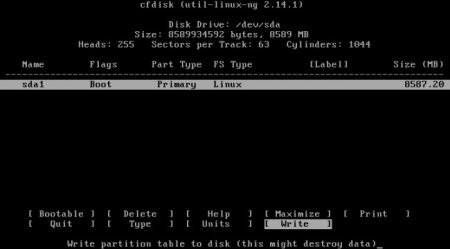
Choose ext3 as a file system and press Yes to confirm your choice.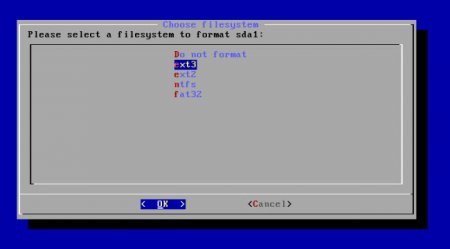
Now it the system will automatically start formatting. Afterwards, it will ask whether you would like to install boot loader, called GRUB. Hit “Yes” and press Enter.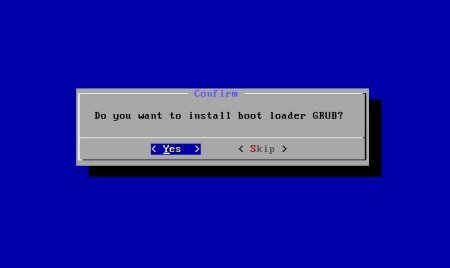
Choose Yes for successfully installing /system directory to the read-write mode.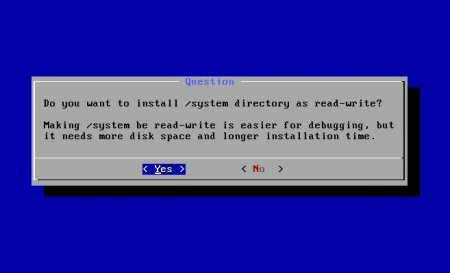
After that you will need to remove ISO file and restart your VM for Android.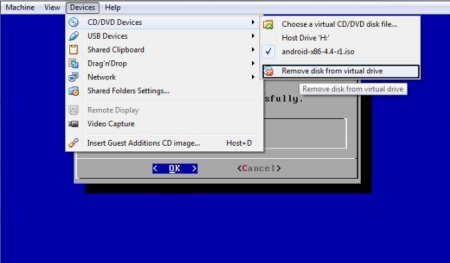
Now Android OS will be able to boot from your VM like any other operating system. Choose the Language in the welcome menu and move forward. Wait for a couple of seconds and you will be asked for switching Wi-Fi on. Skip this step, since it will use the standard internet connection of your VM.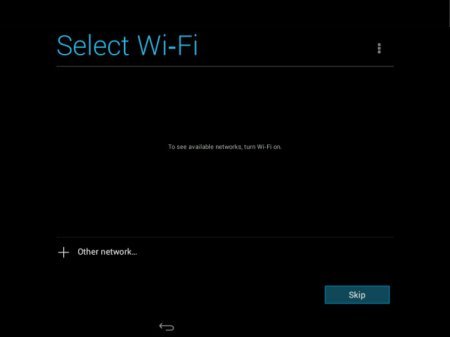
Now enter your Google id , as well as a pass to get started and follow the wizard to complete the initialization.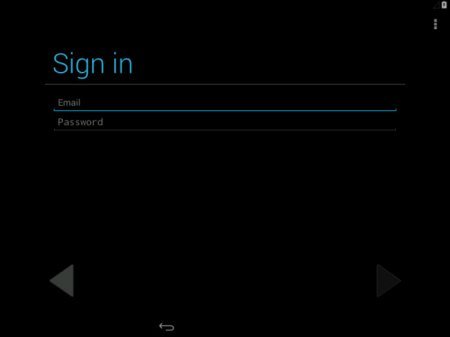

Congratulations! Now you are able to use Android OS on your PC!

Similar Materials