How to remove VirtualBox from Windows
Oracle VM VirtualBox is an incredibly convenient tool for virtualization purposes. The application offers numerous different versions, where the most popular one is VirtualBox for Windows. The program usually installs smoothly using a special handy wizard and deals perfectly with your operating system. However, in case you need to delete the app completely from your PC for any reason, you might face with a few difficulties. The matter is that you will need to remove not only the program itself, but also all its supported files from your machine. Below you can find an easy-to-perform manual with plenty of screenshots on how to uninstall VirtualBox on Windows easily and with minimum efforts.
How to remove VirtualBox from your PC with no difficulties?
- Start with Windows Desktop.
- Then you will need to close all Desktop applications in your operating system.
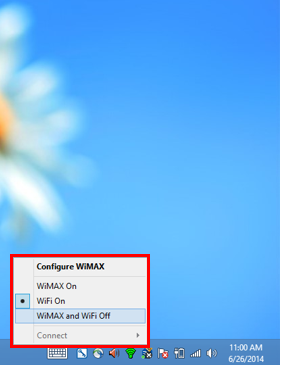
- Turn off both Wi-Fi and LTE using a special Intel ProSet app located the system tray.
- Make sure there is no Ethernet cable connected.
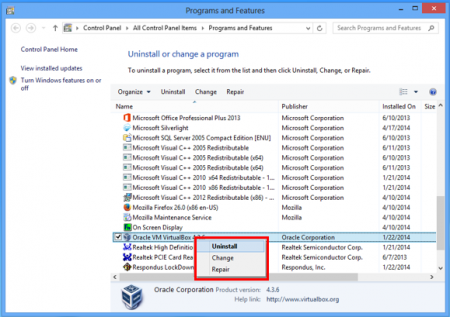
- Get to the Start-Control Panel-Programs and Features. Here you will find a long list of various installed apps ranged in alphabetical order.

- Left click Oracle VM VirtualBox to select the program, then right click it and choose Uninstall option from the context menu.
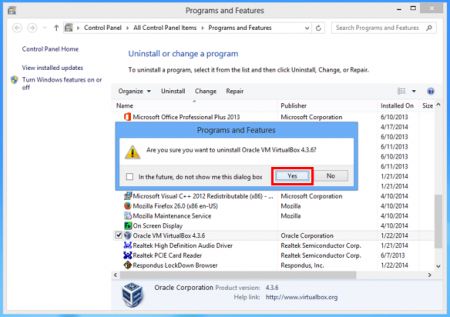
- Then you will be asked whether you still want to uninstall Oracle VM VirtualBox. Click Yes. This action will open a Windows Installer window.
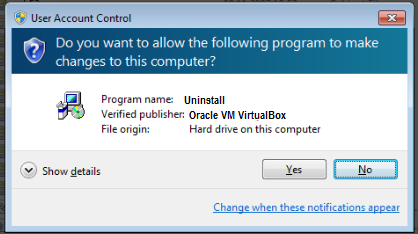
- Then a specially developed User Account Control window will prompt if you want to allow the VirtualBox app to update software on your PC. Click Yes. After that you will be showed a progress bar.
- When the process of uninstallation is finished the program will no longer be visible in the list of the Programs and Features. Now you may close it.
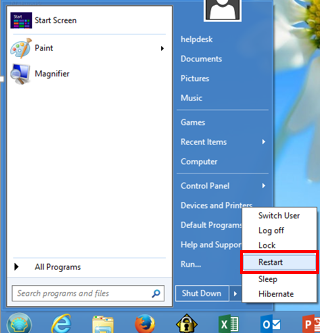
- Go to the Start-Shut Down and select Restart from the proposed menu.
Uninstallation complete! Now you`ve successfully removed VirtualBox and all its files and folders from your machine.

Similar Materials